Monday, August 21, 2006

Father's Day Trifle

For Father's Day this year, our family went to my parents house. If I remember correctly, my mother was out of town, so my brother's family and my family made sure our Dad had a decent Father's Day. One of Sean's favorite desserts in the whole wide world is what we call trifle. We got this recipe from Sean's parents who got it from an English couple they know well. Its still not a totally authentic English trifle, I think; there is no sherry soaked cake. It is a fabulous dessert, though! Its best when made with fresh fruit, and we had just picked up a few gallons of fresh blueberries a few days before. So, for Sean, my brother (Stuart), and my Father, I made trifle for Father's Day.

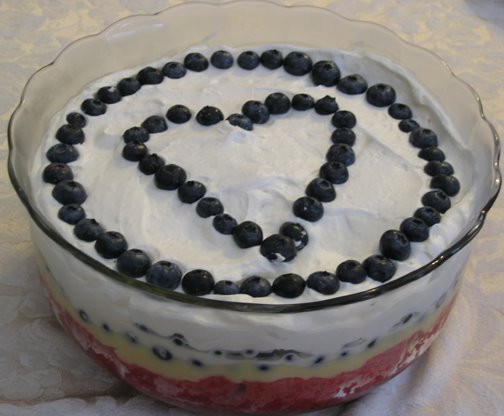
Since I made it before my food picture obsession craze started, I was thinking that I didn't have a picture of it. Well, I had forgotten that my sister-in-law, Esther, had taken a picture of it for me. It looks oh so good! Hannah had helped me design the top with a blueberry heart. Take a look:

Blueberry Trifle


To make the trifle:

Make or buy a plain cake with no frosting. I used this recipe: Yellow Cake Mix. When the cake is cooled, put it in the bottom of a trifle bowl, keeping it in one piece or breaking it into chunks. Make some red Jell-o with cranberry juice instead of water. Pour the warm Jell-o over the cake to fully saturate it. Cover it with saran wrap and chill for several hours or overnight. Meanwhile, make some vanilla pudding. You could make it from scratch, but I often use a box of pudding mix. Chill that too. Once the pudding and cake are fully chilled, layer the pudding over the cake. Then put a layer of blueberries over the pudding. Whip some cream with sugar. Spread it over the top of the blueberries. Top with more blueberries. Make sure it is a nice pattern. Don't want a confusing jumble of berries or anything, do we?

Take a picture and then eat it!

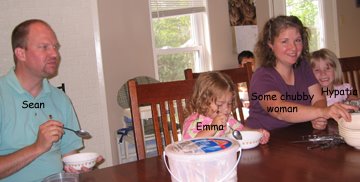
These two pictures show us enjoying the trifle. Dylan is my son, age 10, Hypatia is my daughter, age 6. Wade is my son, age 2. John is Stuart and Esther's foster son. Emma is their daughter. Sean is, of course, my husband. Some chubby woman is me. And Janell is my sister.

By the way, this by no means represents anywhere near all of my family. I come from a family of 10 children. Only Stuart and I live near enough to my parents to be there for these little holidays. Janell was only there for a short visit.

Spicy Chick Pea Stew

This recipe is from a Weight Watcher's cookbook that I borrowed from my parents. They never use it, so I figure they'd never miss it! I did ask for it and I'll happily give it back if they want.

The overall flavors in this recipe are good. Ultimately, I like it. Its just good vegan style eating, which makes Sean a little nervous. I guess I just used the recipe as a guideline, because it seemed off kilter to me. It called for a pound of dried chick peas, cooked, and a whole eggplant. But then it called for a tablespoon each of chopped onion, carrots and celery. Um, what? I love chickpeas, but I thought this recipe could do with a little less of them, and definitely more carrots, onion and celery. In the end, I had to use less chickpeas because as soon as they were cooked, my kids were looking for a snack and I let them eat some, plain, with a little salt. By the time they were done, I had about half of the chickpeas left, which turned out to be just the perfect amount for the recipe.

I think I screwed up the eggplant. I normally like eggplant, but this time it had a slimy texture that really turned me off, so I ended up picking it out. Afterward, I remembered that when I set my eggplant in a colander to drain (like most recipes call for), I forgot to salt it first, so no liquid drained out. Maybe that made it slimy? Or maybe this was just a bad eggplant. I don't know.

Other changes: I added some tomato sauce and extra diced tomatoes, and I forgot to put the peas in at the end, like the recipes tells me to do. I did remember to add them in when we ate this as leftovers.


Spicy Chick Pea Stew

1/2 eggplant, diced
1 teaspoon salt
olive oil
1/2 cup onion, diced
1 carrot, sliced
1 stalk celery, chopped
2 tablespoons fresh ginger, minced fine
4 cloves garlic, minced finely
handful of raisins
1 teaspoon ground cumin
1/2 teaspoon ground cinnamon
2 cans of petite diced tomatoes
1 8oz can tomato sauce
1/2 cup frozen green peas

Toss eggplant cubes with salt and place in a mesh strainer or colander; drain for 30 minutes. Press out excess liquid with wooden spoon.

In a large skillet, heat oil over medium heat; add onion, carrot and celery. Saute, stirring occasionally , until vegetables are wilted, about 5 minutes. Add ginger and garlic; cook 30 seconds.

Increase heat to medium high; add eggplant. Toss and saute until eggplant begins to soften, about 5 minutes. Add raisins, cumin and cinnamon; stir well. Add tomatoes, tomato sauce, and hot pepper sauce; bring to a boil. Cover and reduce heat to medium-low; simmer, stirring occasionally, until eggplant is tender, about 15 minutes. If mixture becomes too thick, add hot water gradually, until sufficiently thinned.

Add chickpeas and green peas; simmer, stirring occasionally, 10 minutes. Sprinkle with parsley if desired, and serve over couscous (or rice).

Sunday, August 20, 2006

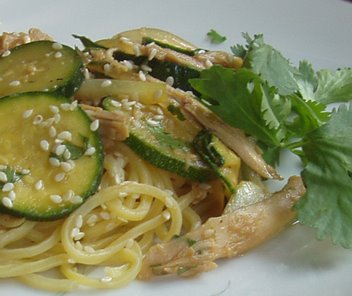
Teriyaki Chicken with Zucchini and Noodles

If you haven't tried Soy Vay Veri Veri Teriyaki Sauce, now is the time! It has become a favorite among my family. My kids can't get enough zucchini when its sauteed in this stuff!

This is an easy, throw together meal. Nothing fancy; it hardly qualifies as cooking. Saute some veggies, debone a rotisserie chicken, and cook some noodles, and you're done! I had some roasted garlic on hand, so I threw some into this meal, but usually I just chop a few cloves of fresh garlic.


Teriyaki Chicken with Zucchini and Noodles

3 medium zucchinis
1/2 med onion, sliced
1 tablespoon fresh garlic, minced, or roasted garlic, mashed
Some Soy Vay Veri Veri Teriyaki Sauce (my kids use too much)
a cup or so of shredded chicken (I often use a rotisserie chicken)
2 tablepoons chopped cilantro
1 teaspoon sesame oil
addtional cilantro and sesame seeds for garnish
fresh oriental noodles, cooked

Saute the zucchini, onion, and garlic in a few splashes of teriyaki sauce. Add the chicken and heat through. Stir in some toasted sesame seed oil and add the noodles. Top with cilantro and a sprinkle of sesame oil. At this point I add in more teriyaki sauce until its flavored to my (kids) liking.

Friday, August 18, 2006

Sticky Buns Revisited

Update:find an updated recipe at Evolution of the sticky bun.

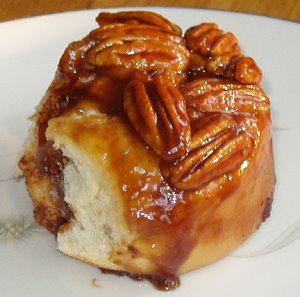
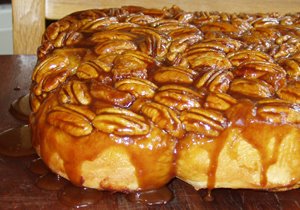
Remember my popular Walnut Sticky Buns? Well, I made them again, but this time I had a bag of pecan halves. I loved the walnuts, and I don't want to be a traitor to their cause, but I thought I'd use pecans this time. Yum!!! Like children I give birth to, I can't pick a favorite. I love both nutty buns (and children) equally. :)

I made one change to the recipe (aside from the kind of nut). I thought that the sticky goo was slightly too chewy when it cooled. I wanted it to be softer, even when it was cooled. So I thought that I could add a bit of cream to the sticky part of the recipe. Thats what I did, and it was PERFECT! I'm pretty sure I added 2 tablespoons of cream (it could have been 3).

Oh Wow! This really is one incredible recipe!!!


Avocado with my Favorite Breakfast

A friend of mine, from this blog, suggested that when I make my Favorite Breakfast, I should add diced avocado. So, this morning, I tried it! It was most excellent!! Thank you, Val!

Laurie's Favorite Breakfast, with Avocado Added!


When I looked at all the pictures I took this morning of my breakfast, they all had a sort of fuzzy, ethereal quality. A haze surrounded the right side of each picture. Hmmm...how did this happen? I thought back to the past day. Hmm.... Using my keen intellect, I was able to reconstruct recent events, and I realized that my 2 year old had smeared his grimy fingers on the lens when he felt the need to return my camera to me from a place where I had put it away (he can climb). Ack! I've wiped it off with a lens cloth and maybe it will be alright.

My poor little camera is suffering anyway. It takes pictures just fine, but you have to know how to hold it just right or it thinks that the lens cover is closed instead of open. The track is broken and so it doesn't put enough pressure on the mechanism that tells the camera...blah...blah...blah. I won't bore you further, but I'm really wanting a new camera now that I'm taking pictures of food! I'm hinting to dh that I need a Canon Digital Rebel XT. Its what many of the foodie (and non-foodie) bloggists use. I want...I want...I need...I need. 'Nuff said.

Wednesday, August 16, 2006

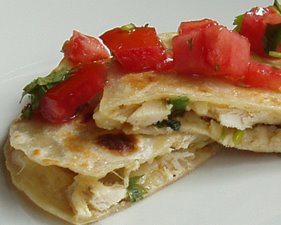
Roasted Garlic Quesadillas

I've made tortillas a couple of times, about 5 years ago. So, I thought I'd try making tortillas again. Maybe I'll try it again in 5 more years. I'd roll 'em out so thin, but when I put it on the griddle, they'd shrink up and be thick. They weren't really too thick, but I wanted them perfect, you know? And round. They definitely were not round. I also had some uncooked tortillas (you buy them raw and cook them yourself, and they are soooo good!), so I used them too. Then I made roasted garlic. I didn't actually roast a whole chicken, though. I cheated and bought a rotisserie chicken.

I remember making something similar to this a couple of years ago. Whenever I think of adding roasted garlic to a quesadilla, I get excited and imagine my family eating it and falling to their knees, overwhelmed with the beauty of the experience, praising my name forevermore. Somehow, that didn't happen last time, and it didn't happen this time. They liked it ok. Just ok! What in the H E double hockeysticks did I make homemade tortillas for??!!! Its a good recipe, but I guess it isn't spectacular. I liked it, though!

I used Cabot Extra Sharp Vermont White Cheddar (our everyday cheese, its so good!), but I imagine that this recipe would be better with Tillamook brand Pepper Jack.

Ok, guess which picture is of my homemade tortilla, and which is raw storebought, but cooked by me. I'll tell you at the end of the post.
Quesadilla #1

Quesadilla #2


Ok, the recipe: Its pretty simple to make, and definitely nothing too fancy.

Roasted Garlic Quesadillas
1 1/2 cups chicken, shredded or chopped (I used a deboned rotisserie chicken)
juice of one lime
1 teaspoon cumin
2 green onions, chopped
salt and pepper to taste
1 tablespoon chopped cilantro
2 heads roasted garlic
shredded cheese (cheddar or pepper jack)
tortillas

Combine the chicken, lime, cumin, green onioin, and cilantro in a skillet and heat through (with a little olive oil if you want or need it). Add salt and pepper to taste. Set aside.

In a small bowl, squeeze out the garlic from the cloves and mash to make a paste.

Heat a skillet and add a little olive oil.

Assemble the quesadillas:

Spread the paste thinly on a tortilla, sprinkle with cheese and top with chicken. I only put the chicken on 1/2 the tortilla, but put the cheese and garlic thinly on the whole tortilla. Fold the tortilla in half and toast in the skillet, about a minute or two on each side, til cheese is melted.

I served this with a mixture of chopped tomato, green onion and cilantro. If I were to do it again, I'd chop the tomatoes finer, more like a salsa. I think avocado and/or sour cream would be excellent also.

Ok, I made the tortilla in picture #1. I only cooked the tortilla in picture #2.

Tuesday, August 15, 2006

Roasted Garlic

Have you made roasted garlic before? If you haven't, you really need to. It's easy and the result is heavenly! You will need to heat up a big oven for just a little garlic, so if you happen to be baking some potatoes (or anything else), then that is the perfect time to roast a few cloves of garlic.

When you roast garlic, the flavor mellows and is very easy to handle, gastronomically speaking. There is none of the sharpness associated with raw garlic. It also becomes very soft, and you can just mash it into a paste which can be spread directly on to bread or stirred into almost any recipe.

I roasted 3 bulbs of garlic the other day and used them to make my roasted garlic quesadillas. I had plenty left over, and so I would mix a bit of the roasted garlic in just about any savory dish I made. I stirred some into my egg mixture for my favorite breakfast, and wow! It was fabulous! It improved every recipe I added it to. Oh, wait, lemme use some proper English...It improved every recipe to which it was added. There, no hanging participle.

This is a popular, tried and true recipe that has been around for many years (I'm thinking centuries). If you haven't tried it, do it now!

Some links for directions:

What's Cooking America
Elise.com

I was baking some sweet potatoes to go with my chili, so I put 3 bulbs into a loaf pan and covered the pan with foil and let them roast alongside the potatoes. It turned out perfectly!

This garlic has been prepped and ready to go into the oven. The top was sliced off and olive oil was rubbed onto it.

As it comes out of the oven. Notice the beautiful carmelized color and the aroma, oh it smells good. Yum!!!!

Sunday, August 13, 2006

Black Bean Chili

I've adapted this recipe from a church cookbook that I got years ago. I like the unique spice combinations given. The cinnamon and clove are not too strong, yet they impart just a touch of their own flavor.

I also used a fresh Aneheim chile instead of using canned. While this is not among the hottest of chiles, I found that it did leave a residue on my hands that burned when I touched my face. You may want to use plastic gloves while cutting. If you want a very hot chili, feel free to substitute something much stronger, like jalepeno, serrano, or, heaven help you, habenero chiles. Definitely wear gloves if you use one of these chiles. Sean once had a friend who was cutting a fiery chile and absentmindedly wiped his forehead with his chile coated hand. He had a line of blisters across his forehead!

I used ground turkey instead of ground beef, but you may use whichever you prefer. Alternatively, you could leave out the meat altogether and substitute a variety of vegetables.

Crescent Dragonwagon, in her book, Passionate Vegetarian, suggested that black bean chili is best when eaten over sweet potatoes. I tried it, and I heartily agree. I often eat it over plain mashed sweet potatoes. The flavors accent eachother nicely.

This is a picture of Aneheim chiles, the kind I used in my chili.


Black Bean Chili

1 pound dried black beans, cooked and drained
1 pound ground turkey (or beef)
1 medium onion, chopped
1 green pepper, chopped
1 Anaheim chili, chopped
3 cloves garlic, minced
1 tablespoon paprika
1/4 teaspoon black pepper
1/4 teaspoon cayenne pepper
1 teaspoon ground cumin
1/2 teaspoon oregano
1/2 teaspoon thyme
1/2 teaspoon basil
1/4 teaspoon cinnamon
1/8 teaspoon clove
1 can petite diced tomatoes
1 can tomato sauce
1 can chicken broth

If the meat is very lean, then saute the meat, onion, peppers (bell and anaheim), and garlic. If not, then cook the meat first and drain off the fat, then saute the vegetables and add the meat. When vegetables are soft, add paprika, cayenne pepper, black pepper, cumin, oregano, thyme, basil, cinnamon, and clove. Stir to combine.

Add diced tomatoes, tomato sauce, chicken broth, and beans. Simmer for up to 1 hour until the chili is thick.

You may top it as pictured: over sweet potatoes and with a bit of sour cream. Yum!

Saturday, August 12, 2006

Lemonade/Limeade

This is a classic beverage that is worth making. If I'm going to drink lemonade or limeade, this is what I'm going to have. No Country Time for me!

I'm lucky though. I never actually make it. Sean makes it for me (well, its really for him, but I reap the benefits too!). We have one of those citrus presses that helps make the job a bit easier.

For the recipe, I remember I heard someone on a cooking show making lemonade and I wrote down the proportions and its what we have used ever since.

We always have mint growing by our door, so we pick some and toss it in. It is a wonderful complementary addition.


Limeade

1 cup lime juice (of course you can use lemon if you want)
1 cup sugar
4 cups water
Mint leaves

Mix the lemon juice, sugar, and water. Stir, stir, stir. Add mint leaves. Refridgerate untill chilled. Stir once more before drinking.

You could make a simple syrup by boiling the water and sugar first, then cooling and adding the lemon juice. I never bother.

Friday, August 11, 2006

Happy Anniversary!


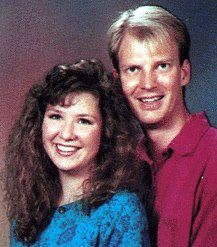
Thats our engagement photo from thirteen years ago, and a picture of us today. We were married on August 11, 1993.

Happy Anniversary to us!

Dylan came home!


My 10 year old son, Dylan, has been staying in Georgia with his grandparents for a while during the summer vacation. He has only been a little homesick. He has uncles, aunts, cousins, and grandparents to keep him busy. The granparents took him and his cousin on a great trip to HiltonHead. They had loads of fun. They even had a cheese tasting party.

These are two pictures of Dylan. One is before he got his hair cut, and the other is after (obviously!)

Anyway, his twin uncles brought him home last night! We've been missing him, so we are glad to have him back.

I think my 6 year old daughter, Hypatia, thought that she had finally gotten rid of Dylan for good.

Our conversation yesterday:

Me: The twins are going to be here tonight. They are bringing Dylan home.

Her: Why? Is he sick?

Me: He's been gone a long time. Its time for him to come back.

Her: Oh

Me: Did you think that he was going to live there forever?

Her: Yeah

Me: And you were happy about that?

Her: Uh huh


So much for my kids loving their siblings.

Pasta Salad

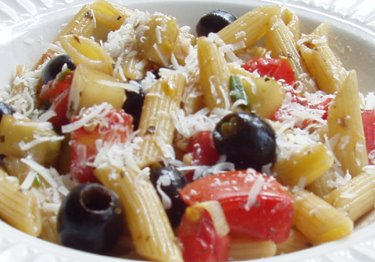
I was needing something to take to a friends house for a sort of a potluck thing. I thought a pasta salad would be nice. I wasn't really planning on putting it on the blog, so I really didn't measure the ingredients. Of course, once I made it, I figured I could go ahead and take a picture, just in case. Once I had the picture, I thought I might as well post it. So here it is. Nothing fancy, just a quick and easy pasta salad.

This is one of those salads that you just look in your fridge to find your ingredients. A big ripe tomato and some cucumber are definitely needed, but after that, you could add whatever you can find. Some good additions to this salad would be broccoli, cauliflower, fresh spinach, carrots, zucchini, and mushrooms. I can't give exact measurements for the dressing; I just poured the ingredients right in without measureing. If you must measure, I think that you could find a recipe for basalmic vinegar salad dressing and use that.

If you love garlic, put plenty in. Because it isn't cooked, the flavor will be quite strong, so if you aren't sure you can handle it, start with just one clove. If you know its not a problem for you and your spouse adores garlic breath, then add 2 or 3 cloves of garlic. If the pasta sits overnight, the flavors meld and the garlic gets even more potent.

Oh yeah, one more thing. If you are an olive snob, then by all means, use better olives, like kalamata, or some other fancy type. I love good olives, but I didn't have any on hand. They are wonderful, but they cost a lot of money! So I just added a can of plain ol' black olives.


Summer Pasta

About 12 ounces penne pasta, cooked
One whole big juicy ripe tomato, chopped
3 green onions, sliced
black olives
1/2 cucumber, chopped
pecorino romano cheese, grated
a quick pour of olive oil
a glug or two of basalmic vinegar
a squirt of mustard
salt
pepper

Cook the noodles and set aside. In a bowl thats big enough to hold everything, add the rest of the ingrediets. Stir to combine. Add the pasta and toss to coat.

Thursday, August 10, 2006

My favorite breakfast

I came up with this breakfast over a year ago. I love it and I eat it regularly. I am the only one in my family who eats it, though. Sean and the kids all prefer cheese with their eggs (usually omelette style), and I wanted to avoid adding too many extra calories. This recipe has about 250 calories. If you need more calories, then you can add avocados. Its a fabulous addition!

In the time that I've been making this recipe, it has gone through its own little tomato metamorphosis. Originally, I ate it with RoTel style tomatoes (canned tomatoes and green chilis). When summer hit and I had tons of garden tomatoes, I made it with my freshfromthegarden tomatoes, and I would top it with a little sriracha sauce. After the summer tomatoes were gone, I found that I didn't like the RoTel on it as much as I thought, and I started using the canned petite diced tomatoes, which I actually like a lot. Instead of using the very spicy sriracha sauce, I started adding a light dusting of cayenne pepper, which added just the right amount of spice. So now when I make it, I use either garden tomatoes or canned petite diced tomatoes.

Should I delete that last paragraph? Does anyone really care? LOL! Without tomatoes, this recipe would be nothing. I have to eat it with the tomatoes, or I don't eat it at all.

Oh yeah, one more thing. When I try to cook this like an omelette, it doesn't really stay together well. The finished product turns out somewhere between an omlette and scrambled eggs.

Um, yet one more thing. Theoretically, freshly roasted red peppers would be best to use. If I could get red peppers cheaply, I would use them. Well, that, and if I weren't lazy too. But, I can get a jar of them at our local grocery store for $1. Cheap, and easy! So that's what I use.


Laurie's Breakfast Eggs

2 eggs
about 2 tablespoons minced onion
about 2 tablespoons chopped roasted red pepper
salt and pepper to taste
tomatoes, chopped
cayenne pepper

Heat a skillet. In a bowl, wisk the eggs. Add the onion, roasted red pepper, salt and pepper. Wisk briefly.

Lightly oil the hot skillet. Pour the eggs onto the hot skillet and cook for a minute or two. fold over like an omelette and then flip over. Cook until desired doneness.

Transfer to plate. Put tomatoes on the side and top with cayenne.

Wednesday, August 09, 2006

My Weekly Menus

I've decided that I'm going to put my current weekly menu in the sidebar. Each week I plan a flexible menu. I plan 5 or 6 dinner recipes and one desert recipe for the week. Breakfast and lunch pretty much work themselves out, so I don't really write out menus for them. My daily post doesn't coincide with what I'm actually making each day because I'm a week or so ahead of myself. What I'm making today will be posted around the 17th or 18th of August, and what I'm posting today, I made last week.

Here is a sneak peek of the recipes that will be posted next week:

  • My Favorite Egg Breakfast

  • Pasta Salad

  • Fresh Lemon/Limenade

  • Blueberry Pancakes with Blackberry Syrup

  • Roasted Garlic Quesadillas

  • Teriyaki Chicken with Zucchini and Noodles


Last week I was writing out my menu and shopping list for this week and Sean came and looked over my shoulder.

"Whatcha doin? Making plans for next weeks pictures?"

Guilty as charged, lol.

Cashew Chicken

A Delicious Stir Fry! I got this recipe from a book called Saving Dinner by Leanne Ely. The only changes I made were to use fresh garlic and fresh ginger as opposed to powdered. I also used less chicken, so I had plenty of extra sauce. Oh yeah, I forgot, I also added some mushrooms because I had some that needed to be used.

Sean is, for some reason, not a lover of stir fry. He puts up with it, but its best if I don't make it a lot. I think he became jaded towards them when I started cranking them out using the frozen stir fry vegetable mixes. I liked them just fine, but he got sick of them. Now, if I make stir fry, it has to be good. Sean declared this one among the best. I think the fresh ginger is what put this stir fry solidly in that category.

I used something called ultra gel to thicken the sauce. Sean likes a less thick sauce, so if I were to use cornstarch, 3 tablespoons seems like way too much. Personally, I would cut it back to 1 or 2 tablespoons.
Photobucket - Video and Image Hosting

Cashew Chicken

3/4 cup orange juice
1/3 cup honey
1/4 cup soy sauce
1 tablespoon cornstarch
1 tablespoon fresh ginger, minced finely
1 tablespoon fresh garlic, minced finely
1/2 teaspoon pepper
1/8 teaspoon red pepper flakes
2 tablespoons vegetable oil, divided
Some red onion, sliced
2 large carrots, sliced
1 celery stalk, sliced
4 boneless, skinless chicken breast halves, cut into 1 inch strips
1 cup cashews

Directions:
In a bowl, combine juice, honey, soy sauce, cornstarch, garlic, and ginger.

In a wok or large skillet, heat 1 tablespoon oil until it begins to smoke. Stir fry vegetables for several minutes until the onions become fragrant. Set aside and keep warm.

In the same skillet, heat another tablespoon of oil until smoking and stir-fry chicken strips until browned and tender.

Add cooked vegetables, cashews, and sauce mixture. Continue cooking until sauce bubbles and thickens.

Tuesday, August 08, 2006

Navy Bean Soup

I'll be honest. The picture turned out better looking than the actual thing. I really liked the look of the soup before adding the tomatoes, and I seriously considered not adding them. I added the tomatoes anyway and I was right. The soup was more asthetically pleasing without them. I didn't have high hopes of getting a decent picture. Since I am now unable to eat anything that hasn't been immortalized in photo, I had to take a picture anyway. Lo and behold, I think the bean soup photo is now one of my favorites so far. Life is full of suprises!

This recipe is just your basic bean soup fare. Its tasty, but could probably be tastier with the addition of a ham hock, chopped ham, or cooked bacon. Its up to you!

I cooked a pound of Navy Beans in the pressure cooker. You may cook them any way you choose. Oh, heck, you could even use canned beans. I'm not sure how many you would need, maybe 2 or 3 cans?


Navy Bean Soup

about 1/2 to 2/3 pot of a pound of cooked Navy Beans
1 tablespoon oil
1 cup of carrots, sliced
1 stalk celery, sliced
1/2 medium onion
3 cloves garlic, minced
1 can chicken broth
1/2 teaspoon sage
1 bay leaf
1 can petite diced tomatoes
salt and pepper to taste

In a large saucepan, combine the carrots, celery, onion, and garlic. Saute with a bit of oil. When the onions are soft and fragrant, add the chicken broth, sage, and bay leaf. Add about 1/2 of the cooked beans (drained). I think I added more than half of them. More like 2/3 of them. Simmer until the carrots are just like you like them (crunchy or soft, its up to you), stirring frequently. Add the tomatoes, and simmer a minute or two more. Add salt and pepper to taste.

Monday, August 07, 2006

Big Overstuffed Chairs

My brother just moved and is looking for that perfect chair to go in his house. He wrote this, and I thought it was great, so I'm posting it. Its not food related, but the comfort of a big, overstuffed chair rates right up there with the comfort of good food. So I thought it would work here.

I like big, soft chairs. I like the kind of chairs that you can get lost in with a book and a cup of cocoa. The kind that someone might walk past without noticing that you’re in there. The kind in which you could choose any direction to face- forward, left, right, even backward and still not fall out. Have you ever sat in a short little chair and as soon as you sat down you started sliding forward toward the edge of the seat? Yeah that’s not my kind of chair. In my favorite chair you might need climbing gear to get back out once you get in. The kind of chair I could fall asleep in- alone, or with Lori, or with T-Bone-the-dog. A nap chair. An easy chair that doesn’t need a lever on the side because it already is comfortable without any special reclining mechanism. My kind of chair is the reward at the end of a long day. It works great for TV, listening to music, or just staring out the window and day dreaming. It has armrests like giant pillows, that spread out like wings to carry me off to la-la land. I can sit cross-legged or curl my knees up or throw my legs over one side and my arms over the other- if I wanna. I could even put my back on the seat and my legs on the backrest and pretend I’m blasting off in a mercury-atlas rocket into space- if I wanna. I could even bring my wireless laptop and surf the internet and post weird things on MyFamily.com like I’m doing now. In my chair, my favorite chair. Not the kind of chair with stiff sides that rise straight up. Not the kind with squeeky plastic coating, oh no no no. Not that kind of chair.

I haven’t found it yet but I’m still looking. Oh I've sat in chairs that I liked a lot but not the perfect one, not yet. I might need to build a new addition onto my house when I find it. Because I like big chairs.

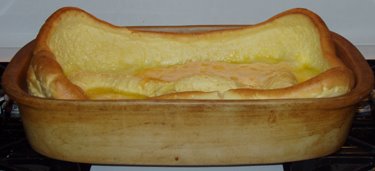
German Pancakes and Homemade Syrup

My husband's family lived in Germany many years. I don't know if they learned to make German pancakes from the Germans, though. I'll have to ask them. Whether or not this is an authentic recipe, it is fun and exciting to make. Be warned, it is chock full of eggs and, (gasp), plenty of butter. If that is just not something you can bring yourself to eat, well then, just consider your reading of this particular blog entry to be solely academic. No one is forcing you to make this, ok? It does taste good, though!


German Pancakes

1 cup milk
1 cup flour
1/4 teaspoon salt
6 eggs
1/3 cup butter

Place a 9x13 pan in a 375 degree oven. Allow to heat. In a blender, combine all ingredients except butter. Blend until smooth. Don't overblend. Once the oven is hot, place the butter in the pan in the oven and allow to melt. As soon as it is melted, pour the batter into the pan. Bake for about 20 minutes.


Growing up, my parents never bought pancake syrup. They always made it. The same was true in Sean's family. I think its a Mormon thing. Anyway. I never buy syrup. I don't like store bought syrup and why buy it when it is so cheap and easy to make your own? Homemade syrup is thinner, especially when its hot (it thickens up a bit when its cooled).

I bought some pancake syrup about a year ago for a camping trip and its still sitting there, in my pantry. We just don't like it. The flavor isn't as good and the thickness is just so fake and off putting.

Just try this. Once you are used to it, you won't want to buy syrup anymore.

Homemade Syrup

1 cup granulated sugar
1 cup brown sugar
1 cup water
1 teaspoon maple flavoring
1 teaspoon vanilla extract

In a small sauce pan, bring the sugars and water to a boil, stirring occasionally. Remove from heat, allow to cool slightly and add the maple flavoring and vanilla extact. Stir to combine. That's it!

Saturday, August 05, 2006

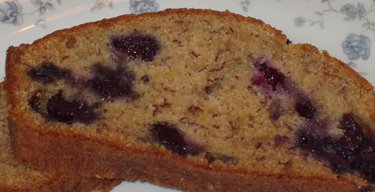
Another Blueberry Banana Bread

I'm not going to give a recipe, because it is the same as this one, minus the things I said I wouldn't do again. So, this time, I put only 1 teaspoon of cinnamon, and no molasses. It was perfect. I really like the blueberries in it.

Did I say that I really like the blueberries in it? Because I do.

But its still not perfect because it has no walnuts in it. (I'm still out of walnuts!). When I FINALLY make Walnut Blueberry Banana Bread, I'll let you know!

Friday, August 04, 2006

The Origins of My Blog

I started blogging about 1 year ago. At the time, the blog was called "My Dumb Blog". I am not a talented writer and I just posted things here and there. I didn't tell anyone about the blog and I really didn't want anyone to read it. I didn't know anything about food blogs and I had never taken pictures of my food before. My blog had no direction.

Then I found a food blog. Then another, and another. This was pretty cool! These talented people take really nice pictures of their food. Not that I could do it, but thats nice that they do. So I would read and enjoy.

One day, a few weeks ago, I made a cake. I took a picture. It was ok. Nothing special. I posted it on my family's message board for fun. A few days later, I took another picture of another cake. It turned out sort of nice. Then I took another picture, and another. And, to my HUGE suprise, the pictures weren't half bad!

I guess I should have started a new blog, but I started adding these food entries to my old blog. Then I decided that I didn't want anyone reading my old entries, so I resaved them all as drafts. But they were still listed in the sidebar! Sigh. Whatever. I have now reposted them and my year's worth of posts are there for you to enjoy. Read them if you want. I don't care. I'm not a talented writer.

Knock yourself out.

Mushroom Bacon Swiss Meatloaf

I was doing some research on Once A Month Cooking a few days and stumbled across a recipe that looked pretty good. I'm not sure if I'll ever try OAMC (as it is referred to), but I definately wanted to try this. I adapted the recipe a bit, and I used ground turkey instead of ground beef.

When I make meatloaf, I like the fat to drain off as much as possible. So the thought of cooking it in a loaf pan (letting it swim in its own grease) always seemed yucky to me. I eventually came up with my own way of cooking it. I form it into a ring on a broiler pan. The result is something like a meatloaf bundt cake. Then the fats and grease drip into the bottom part of the broiler pan. I had always done this with my ground beef meatloaf recipe with excellent results. I substituted ground turkey this time and the mixture just seemed too fragile for this sort of treatment. I was sure that there was no way it would hold up on its own. In order to avoid having one big flat turkey patty, I cooked it in a loaf pan. The turkey was low fat (97/3) anyway, and so there wasn't much grease.


Mushroom Bacon Swiss Meatloaf

1 lb ground turkey
1 egg
1/3 cup milk
1/3 cup crushed crackers
1/2 medium onion, chopped
4 button mushrooms, chopped
1/3 cup cooked and chopped bacon
1/3 cup shredded swiss cheese
A few squirts of ketchup

If you have just cooked the bacon, remove the grease from the pan, reserving 1 tablespoon. If not, then add one tablespoon of oil to the pan. Saute the onions and mushrooms for about 2 minutes. Combine all ingredients except ketchup. Mix thouroughly. Pat into loaf pan. Top with ketchup, and spread evenly. Bake at 350 degrees for 1 hour

Thursday, August 03, 2006

Thai Peanut Sauce and Cucumber Relish

I was first introduced to Satay shortly after I married my husband. His parents were living in Berlin, Germany at the time, and we were visiting from the states. They took us to a wonderful Thai restaurant that had a very lavender interior. I ordered a yummy peanut chicken. It seemed the oddest thing at the time, but I liked it very much. That was my first exposure to peanuts being eaten as anything other than peanut butter, roasted peanuts, or in candy.

Since then, every time Sean and I go to a Thai restaurant, we always order their Satay. It is usually served as an appetizer with woefully few cucumbers.

I started looking in books for recipes. I ran across a book called Real Thai : The best of Thailand's Regional Cooking by Nancy McDermott, in the local library. The Satay recipe in this book is the one I have used now for years. I haven't made any of the other recipes in the book, but they are probably good too! Her recipe calls for pork (Moo Satay). You can use any meat you want. I have used pork and chicken and both are equally excellent.

I really didn't like the marinade given for the meat, so I use something different (see previous post). Deal with it. Also, this dish is not traditionally served with rice, but when I make it for dinner, we eat it with rice. I make no apologies to the Thai's for this grave error. I like it this way and I'm not going to change.

Oh yeah, a word about Thai Curry Paste. You can make your own or buy pre-made paste in the oriental store. I buy mine. This stuff is very spicy hot. I usually use a little less than a tablespoon in this Satay recipe. Get to know your paste before you commit to 2 full tablespoons.

One more thing. This recipe seems like it has too much liquid and will be really runny. But there is something about the mixture of peanut butter and coconut milk. When its heated, it thickens nicely. Don't overcook it or the oil in the peanut butter will separate out. Just cook it gently until its nice and thick. I have made this sauce with Jiffy style peanut butter, homemade peanut butter (I crushed the peanuts myself) and all natural peanut butter. I prefer it with either homemade or all natural peanut butter.

Now, for the best peanut sauce recipe in the world!


Thai Peanut Sauce

1/2 cup coconut milk
Up to 2 tablespoons Red Curry Paste
1/2 cup chunky peanut butter (I use smooth too. I like it either way)
1/2 cup chicken stock
2 tablespoons Tamarind liquid or lime juice (I've always used lime juice)
3 tablespoons palm sugar or brown sugar (I usually use brown sugar)
1 tablespoon fish sauce (I know it stinks, but put it in anyway! Just do it!)
1/2 teaspoon salt

Warm the coconut milk in a small sauce pan over medium heat. Stirring occasionally, heat the milk until it reaches a gentle boil and tiny beads of oil glisten on the surface, about 5 minutes. Add curry paste and stir occasionally until it dissolves into the milk and releases its fragrances, about 3 minutes. Add the peanut butter, chicken stock and sugar and cook gently until the sauce is smooth, about 5 minutes. Remove from heat and season with lime juice, fish sauce and salt. Taste and adjust for a pleasing balance of sweet, sour and salty. Cool to room temperature.

Now on to the relish:

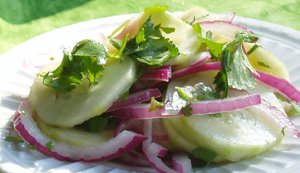
I love this relish! The recipe calls for 3 tablespoons chopped purple onion, but I love the onion so much that I just slice 'em big and put in plenty. Yum! You could easily cut back if you can't stomach that much onion (what's wrong with you!?).

I never worry about the chopped peanuts, to be honest. I never have them on hand and it just isn't a big deal to me, especially since I always eat this with the peanut sauce.

Traditionally, when this is served with the Satay, the relish is always freshly combined. They don't let the cucumbers sit in the vinegar and turn into pickles. I love it both ways. So I make plenty so I have leftovers and I can eat some the next day. By then they have a nice, sweet pickled flavor.


Cucumber Relish

1/2 cup water
1/2 cup sugar
1/2 cup cider vinegar
1 teaspoon salt
1 teaspoon fresh hot chili, chopped, or thai chili paste
1/2 cup red onion, sliced
1/4 cup cilantro, chopped
1 lg. hothouse cucumber or 2 regular cucumbers
1 tablespoon chopped peanuts

Combine vinegar, water, sugar, and in a small sauce pan over medium heat. Bring to a gentle boil, stirring to dissolve. Cool to room temperature. Just before serving time, peel cucumbers, slice them crosswise, about 1/4 inch thick. Combine the cucumbers with the vinegar dressing, onion, and chilis. Top with peanuts and cilantro.

Wednesday, August 02, 2006

Hot Fudge Brownies

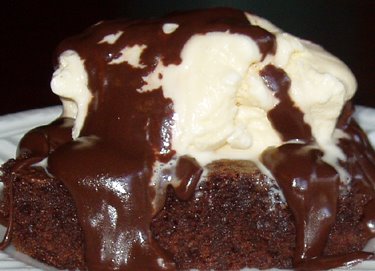
I was ready to make banana bread since we needed to use some bananas anyway, but noooo! Everyone else in the family had their hearts set on brownies for some reason. So, of course I ended up making brownies. I still haven't bought any walnuts since making those gorgeous sticky buns, so I had to make walnut free brownies. I'm not sure just how long to bake this recipe. This is one recipe that I just keep an eye on and when it looks right, I take it out of the oven.

I'll tell you the truth. I don't love brownies. I like them, but I just don't love them. I have NEVER liked brownies from a mix. They really turn me off for some reason. This is not a snobbishness that I developed as I got older. I couldn't stand brownies even when I was a kid. It wasn't until I tasted homemade brownies that I decided that they had any redeeming value. Trust me, homemade brownies have PLENTY of redeeming value. With all that chocolate, butter and eggs, how could anyone go wrong? So now, I eat brownies, even if I don't want to marry them.


Brownies

1 cup flour
2 cups sugar
1 cup butter
3/4 cup cocoa powder
1 teaspoon baking powder
1/4 teaspoon salt
2 teaspoons vanilla
4 eggs, beaten
1 cup walnuts, roughly chopped

Preheat oven to 350 degrees. Melt butter and add cocoa. Stir until smooth. Mix dry ingredients in a bowl. Add eggs and vanilla. Stir until moistened. Add cocoa and butter mixture. Stir until smooth. Fold in chopped walnuts. Bake in greased 9 by 13 pan. Its done when the edges are set and the center is only barely set.

Now, about the hot fudge sauce:

I have a couple of hot fudge sauce recipes. I couldn't make the one I originally planned to make because I discovered that I was out of evaporated milk. So I thought I'd make the one that uses chocolate chips and sweetened condensed milk. I got the idea to tweak it a bit and use squares of unsweetened baking chocolate instead of the chocolate chips. I really liked the result. The sauce turned out to be less sweet, more like a dark chocolate sauce.

I got a little hasty when I melted my chocolate and almost ruined my sauce. I had the heat a bit high. Don't do that! You need to melt it over a nice, even, low heat (a double boiler would be nice). The chocolate was starting to stiffen up over that high heat, so I added some sweetened condensed milk to smooth it out a bit, and I think it caused the chocolate to sieze. Uh Oh. I turned the heat down, added the rest of the milk, and stirred like crazy. Ultimately, the recipe turned out ok, but I thought it was history for a minute there!


Hot Fudge Sauce
1 can sweetened condensed milk
4 ounces unsweetened baking chocolate
1/4 cup water
2 tablespoons butter
1 teaspoon vanilla

Melt chocolate in a small sauce pan. Stir in sweetened condensed milk. Heat through. Remove from heat and add butter and vanilla. Add water to thin to desired consistency.

I'm sure you don't need directions on how to make hot fudge brownies, but here you go:

Top a square of brownie with a scoop of vanilla ice cream and some hot fudge sauce. Eat.

Tuesday, August 01, 2006

Thai Marinated Chicken

I love this chicken. This is some awesome stuff! I use this instead of the marinade given in my Satay recipe because I just like it better. I made the Satay recently and I'll give the recipe soon. Mmmm...yummy!!!

This is best when cooked on a grill, but I also cook it under the broiler with good results.

It can also be sauteed in a fry pan, like a stir fry (without the skewers of course!). For a really awesome treat, throw in some fresh basil leaves at the last minute.

For those of you who aren't familiar with fish sauce: It stinks like crazy. But it is essential in Vietnamese and Thai cooking. I could eat Thai food without it, but I wouldn't want to. I always have some on hand


Thai Marinated Chicken

raw boneless skinless chicken, cut into thin srips (I used breasts)
2 tablespoons soy sauce (preferably low sodium)
2 tablespoons oyster sauce
2 tablespoons thai chili paste (Its very spicy hot. You may want to use less.)
2 tablespoons fish sauce (nam pla)
3 or 4 cloves chopped garlic
2 tablespoons chopped cilantro

Mix all ingredients except the chicken in a bowl and stir. Add the chicken, and mix well to coat. You can add some water to thin it a bit. Its pretty thick and salty otherwise. Allow to marinate for an hour or more. If you are threading onto bamboo skewers, then make sure they have been soaked in water for a while first. I have these big long metal shish kabab skewers that I used. Cook on your outside grill until done!

Monday, July 31, 2006

Apple Chicken

Yet another recipe from Leanne Ely's book Saving Dinner. Again, another hit! Dh is totally bored with chicken and sauce recipes, so I'm going to have to lay off them for a while. Sigh. But the kids just loved it! I thought it was very tasty too! Hannah and Hypatia and their friend who ate with us just ate it all up very happily. Of course Hypatia picked off all the apples, but she ate the chicken just fine.

I didn't notice until I was copying the recipe into the blog that it said to cut the chicken into little pieces. I did my typical long strips. Ooops! I didn't use so many apples either. It seemed like too much to me. So, I used only 2 chicken breasts, 1 apple, and since I only had 1/2 cup of wine on hand, I cut all of the sauce ingredients by 1/3. I didn't use cornstarch, either. I used ultra gel instead.


Apple Chicken
1 1/4 teaspoons vegetable oil
6 boneless, skinless chicken breast halves, cut into 1/2 inch cubes
4 Granny Smith apples, cored and sliced into 1/2 inch wedges
3/4 cup dry white wine
3/4 cup chicken broth
1/4 cup brown sugar
1/4 cup cider vinegar
3 tablespoons cornstarch
2 tablespoons Worcestershire sauce
1/2 teaspoon salt
1 teaspoon black pepper

Heat oil in a large nonstick skillet. Add chicken and brown on all sides. Add apple slices, saute 3 minutes, stirring occasionally. Add 1/2 the wine and chicken broth, reduce heat, cover, and simmer 10 minutes. Mix remaining wine and broth together with remaining ingredients; add to skillet. cook over medium heat, stirring consstantly until sauce thickens.

Sunday, July 30, 2006

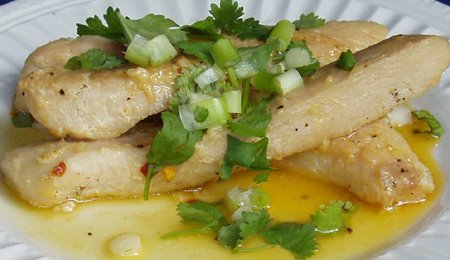
Spicy Honey-Glazed Chicken

This is another recipe from Leanne Ely's Book Saving Dinner. It was a winner. Sean loved it because it was topped with fresh cilantro. Otherwise, I think he would have thought it was pretty ho-hum. Fresh herbs make such a huge difference! Personally, I thought it was a great recipe, and my children liked it, too. Of course Hypatia picked off the cilantro and onions that topped it.

When a recipe calls for whole chicken breasts, I usually cut the breasts into strips. I find that the whole breasts are too big for one person anyway. I used two large breast halves for this recipe. Other than that,I followed the recipe exactly.


Spicy Honey-Glazed Chicken
1/4 cup honey
2 tablespoons frozen orange juice concentrate
2 cloves garlic, pressed
1/8 teaspoon red pepper flakes
1 tablespoon butter
1/2 teaspoon olive oil
6 boneless, skinless chicken breast halves
Salt and pepper to taste
cilantro, chopped
green onions, chopped

In a small bowl, combine honey, orange juice, garlic, and red pepper flakes.

In a skilllet, heat butter and olive oil over medium heat, add chicken, salt and pepper to taste, and brown, about 4 minutes on each side.

Add honey mixture to the skillet and cook, turning to thoroughly coat the chicken. Cook 2 more minutes or until sauce begins to thicken.

Tp serve, place chicken on plate, spoon sauce over the top and sprinkle with cilantro and green onions.

Saturday, July 29, 2006

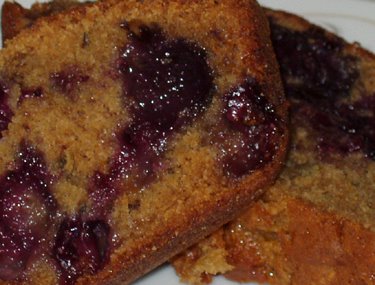
Blueberry Banana Bread

We love banana bread and I make it often. Usually I put walnuts in it, but I used up all of our walnuts the other day when I made those glorious sticky buns. So no walnuts today! I considered putting chocolate chips in. Sean and I like it that way, but for some reason, my children don't! LOL! Go figure. I got the idea to put blueberries in the bread. Ding ding, we have a winner! It was great! We buy blueberries in the summer at the farmers market and then bag and freeze them. We mainly do this to maintain Sean's blueberry pancake with blackberry syrup obsession (about which I'll post in a future blog). We always have frozen blueberries on hand. So I made one of the banana bread loaves plain for the kids, and I added blueberries to the other. It was simply wonderful! Yum!

I use the banana cake recipe from an older edition of the Betty Crocker cookbook (around 1986, I think) for my banana bread recipe. I usually add 1 teaspoon of cinnamon to the recipe. For some crazy reason I added 2 this time. I'll stick to 1 in the future. Also, I got the idea to add some molasses to this recipe too. I didn't like the addition, and I won't be doing that again! Maybe I just put too much in. I think I added somewhere between 1 and 2 tablespoons. I definately tasted it in the finished product. It also gave the bread a much darker color.


Blueberry Banana Bread
2 1/2 cups all purpose flour
1 1/2 cups sugar
1 1/2 teapoons baking powder
1 teaspoon baking soda
1 teaspoon cinnamon
1 teaspoon salt
1/2 cup butter
1 cup mashed ripe banana
2/3 cup buttermilk
2 eggs
1 teaspoon vanilla
about 1 1/2 cup fresh or frozen blueberries (I didn't really measure)

Grease and lightly flour two loaf pans. In a mixer bowl combine the first 5 ingredients. Add butter and banana; beat on low speed of electric mixer till combined. Add buttermilk, eggs, and vanilla; beat 2 minutes on medium speed. Fold in blueberries. Turn batter into prepared pans. Bake in a 350 degree oven for 30 minutes or until done. Cool 10 minutes on wire racks. Romove from pans; cool thoroughly.

Thursday, July 27, 2006

Lemon Pasta with Simple Sauteed Mushrooms

My in-laws make a lemon pasta similar to this. I just added the ham for something different. The garlic is my addition also.

These mushrooms are just one of my favorite things to make. I learned from my Dad that just about anything is good when sauteed in Worchester Sauce. To quote Hannah when she eats these mushrooms: "Mmmmmm, yum, you made them just how I like them."

This is an easy and quick meal to make.


Lemon Pasta
4 cloves garlic, chopped finely
juice and zest of 2 lemons
1/2 cup heavy cream, or half and half
1/2 cup grated pecorino romano cheese (parmesan would be good, too, but I only had pecorino, so thats what I used)
about 4 oz. ham, chopped into big(ish) chunks
1/2 lb linguini, cooked
salt and pepper, to taste

Boil the water and cook the pasta.

While the water is coming to a boil, make the sauce. In a medium saucepan, combine the cream, zest, lemon juice, and garlic. Heat gently to just boiling. Add the Add the cheese and stir. Add the ham, and heat through. Remove from heat. (Be careful not to overheat)

When the pasta is cooked, add it to the sauce and stir to combine.

Simple Sauteed Mushrooms
1/2 lb. mushrooms, sliced
2 cloves garlic, chopped finely
1-2 tablespoons Worcestershire Sauce
1 tablespoon olive oil
Salt and pepper, to taste

In a saucepan, combine all ingredients, and saute until the mushrooms have released juices. My kids love these! Even Hypatia voluntarily ate some!

Wednesday, July 26, 2006

Romano Turkey Burgers

This next recipe comes from a book called Saving Dinner, by Leanne Ely, who runs a website, also called Saving Dinner. In her book, she plans out dinners by the week, complete with weekly shopping lists. All you have to do is pick a week and use her list. On her website, you can subscribe to her service which provides new menus every week. I don't know if I would ever need pre-planned menus like that, but her book is full of simple dinner ideas. They are all quick and easy to make. I've only made two recipes so far, and they were both good. I'm planning on using many of her recipes during the coming month. I'll let you know how they turn out!

I changed this recipe very little. I used real garlic instead of powder. This is something I almost always do. Call me a garlic snob if you want, but I don't use powder or even those jars of already chopped garlic. Honestly, nothing compares. So, I used 2 or 3 gloves of garlic, and since I broke my garlic press, I had to mince it by hand. Luckily, my dh likes the smell of garlic and has never complained when I'm saturated with it, lol.

Other than that, the recipe was made as is. I used whole wheat rolls instead of buns, but I don't count that as a change. For some reason, I thought my rolls were smaller than a typical bun, so I made the patties rather small. So we had to use 2 patties on each roll.

Sean liked them, I think. Well, he ate two burgers. Hannah stuffed herself silly. Needless to say she loved them. Dylan would have liked them, but he is out of town, visiting grandparents. Hypatia, who is by far my pickiest eater, just pointed at the onions and gave me that look that says "You know I can't eat that!" She ate a bite or two. Wade nibbled at them, but thats pretty typical, too.


Romano Turkey Burgers
1 1/2 pounds ground turkey
3/4 cup Romano cheese, grated
1/2 cup onion, minced
2 cloves garlic, minced
salt and pepper to taste 6 whole-wheat hamburger buns

Turn on broiler. In a bowl, mix all ingredients (except hamburger buns) together well and shape into six patties.

Place patties on a broiler pan and broil for 10 minutes, turning once, Patties are done when they are no longer pink in the middle. Serve on warmed hamburger buns.

Tuesday, July 25, 2006

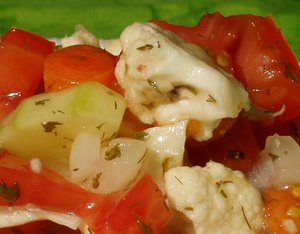
Laurie's Simple Summer Salad

I was just going to make a simple green salad, but then I remembered my cauliflower just sitting there in my fridge, so I thought I'd make it the base of my salad instead of lettuce. The dressing for this salad is just whatever dressing I had in my fridge, which happened to be one I bought from Big Lots, so I don't know how easy it is to find it normally. Anyway, its Olde Cape Cod brand Lite Blush Wine Vinaigrette. Its a decent dressing. Nothing too special, though. Of course, I could have used olive oil and basalmic vinegar, but, for some reason I didn't.

This salad seems to be lacking in nice bright green color. I guess I shouldn't have peeled my cucumbers. I think that would have helped. Also, fresh herbs would have added color and flavor. I didn't have any on hand, so I used dried, which is very ho hum. If I were going to make this for company, I would definately make these changes.

Over all, this is a nice, fresh salad that will compliment my Romano Turkey Burgers I'm planning for tonight.


Laurie's Easy Summer Salad

1/4 head cauliflower, chopped
1/2 large beefsteak style tomato, diced
1/2 medium sweet onion, sliced
1/4 cucumber, peeled and diced
4 or 5 baby cut carrots, sliced
1 clove fresh garlic, minced finely
1 tsp dried parsley (or 1 tbsp fresh)
1/4 tsp dried dill (or some fresh)
About 1/4 to 1/2 cup dressing
Salt and pepper to taste

Combine all ingredients in a bowl and toss to combine. I made this a few hours early to allow the flavors to meld and to soften and marinate the cauliflower.

Monday, July 24, 2006

Walnut Sticky Buns, AKA HEAVEN!!!!

Update: Find the updated version of this recipe at Evolution of the Sticky Bun.

Ok, the results are in. These were a huge success! "Wow!" That's all Sean could say! Just "Wow!" After a while he said "I think I like these better!" He was worried about whether or not these would be as good or better than my usual cinnamon rolls. Well, now I may have to make them this way every time.

Normally I make traditional cinnamon rolls with cream cheese frosting. Sean loves them and usually gives me a sad face whenever I suggest a variation. But today, I'm trying sticky buns! Yes, I know, they are supposed to be made with pecans, but we are out of pecans (I couldn't keep the kids out of them and before I knew it they were gone!), so I am using walnuts. I think that the reason that pecans are always used is because they are a much sweeter nut, compared to walnuts. But I like walnuts in my baking and they never seem too bitter once they are baked, so I figured that this change would work for us.

Sean always asks (begs!) Me to make changes to the filling recipe. He figures that if a little butter is good, then a lot of butter is great, and so on... Basically, I have to double the filling. Then I quadruple the cinnamon. Yes, folks, you read that correctly. It's the way he likes it. So, if you want to make it exactly the way I make it, then the filling ingredients would be: 1 cup brown sugar, 1/4 cup cinnamon, and 1/2 cup butter.

Also, the topping calls for light corn syrup and I didn't have any on hand, so I used dark corn syrup instead. I can't imagine that this would change the taste dramatically.

Photobucket - Video and Image Hosting

Walnut Sticky Buns
Dough:
1 1/2 teaspoons instant yeast (the kind that you add to the flour without proofing)
1/3 cup sugar
1 cup milk
4 Tbsp. unsalted butter, plus more for greasing
2 large eggs
1 teaspoon. salt
4 to 4 1/4 cups all-purpose flour, plus more for dusting (I used 4 cups in the dough)

Filling:
1/2 cup firmly packed light brown sugar
1 Tbsp. ground cinnamon
4 Tbsp. unsalted butter

Topping:
3/4 cup firmly packed light brown sugar
4 tablespoons unsalted butter
3 tablespoons honey
1 tablespoon light corn syrup
1 1/2 cups (6 ounces) coarsely chopped pecans (I used walnuts)
2 tablespoons cream or half and half (optional)

Make the dough. In the bowl of an electric mixer, combine 2 cups of the flour, yeast, sugar, and salt. Stir to combine.

In a microwaveable bowl (I use a two cup pyrex measure), melt 1/4 c. butter. Then add the milk and microwave for about 30 seconds. Add the eggs. Whisk until smooth.

Add the liquid mixture into the dry, and mix on low speed until blended. Switch to a dough hook and then, again on low speed, slowly incorporate the remaining 2 to 2 1/2 cups of flour. Increase speed to medium, kneading dough until smooth and slightly sticky (adding a little more flour if too wet), 3 to 5 minutes. I like to make sure the dough is quite sticky at this point. It makes for a tender dough.

Shape the dough into a ball and place in a large, oiled bowl. Turn dough over in bowl to coat with the oil from the bowl. Cover the bowl with plastic wrap. Let rise in a warm place until doubled in volume, about 1 hour (or 2 hours if not in an entirely warm place). It's the middle of summer, so I put the bowl outside.

It was at this point that I decided to take pictures of the process. Deal with it, ok? lol I don't mean to be annoying, honest! I'm just having fun!

Photobucket - Video and Image Hosting

While the dough is rising, I make the filling and the topping.

For the filling, I just melt the butter in a microwaveable bowl and then add the cinnamon and sugar and stir until smooth.

Make the topping. In a 1-quart saucepan, combine brown sugar, butter, honey and corn syrup over low heat; stir until sugar and butter are melted. Pour mixture into a greased 9" x 13" pan and sprinkle pecans (or walnuts) on top.


Photobucket - Video and Image Hosting
After the dough has risen, punch down. Turn out onto a lightly floured cutting board and let sit for 5 or 10 minutes (ok, I don’t usually let it sit, but I think that if you let it rest for a few minutes, the dough will soften up a bit and be a little easier to shape).

Roll dough out into a 12" x 18" rectangle (I never measure and my rectangle is never picture perfect).

Photobucket - Video and Image Hosting

Brush with melted butter and sprinkle with cinnamon-sugar mixture. Starting with the long side, roll dough into a cylinder. (My cylinder is always pretty lopsided, but it still works just fine). Place seam side down on a flat surface and cut crosswise into 12 slices. Dental floss is good for this, but I often just use a serrated knife. In the picture, I scored it first, mainly because I like making those little slices into the dough, heh heh.

Photobucket - Video and Image Hosting

Place dough slices, flat side down, on top of prepared topping.

Photobucket - Video and Image Hosting

Cover with plastic wrap. Let rise for about 30 to 45 minutes .

Preheat oven to 375̊. Bake buns until golden, 30 to 35 minutes. Remove pan from oven and immediately (and carefully as not to spill hot topping on your toes!) invert onto a serving tray or baking dish. The first picture is right after taking the pan out of the oven and just before inverting it onto my cutting board. The second one is obviously the inverted one.

Photobucket - Video and Image HostingPhotobucket - Video and Image Hosting

Let buns cool slightly and serve warm.
Friday, July 21, 2006

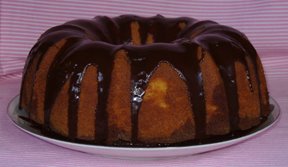
Amazing Tunnel Cake

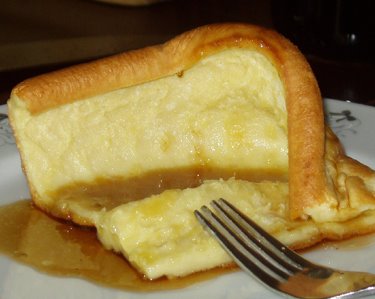
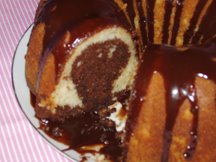
This recipe comes from a library book which features homemade cake recipes, no mixes. Unfortunately, I returned the book without making note of the title or author, so I can't give credit. I just looked at the library's website, but they don't have pictures (and neither does Amazon), but I think it was this one: Good Old Fashioned Cakes, by Susan Kosoff. The cake turned out just like the book described! Look at the pictures and see what you think. This is the first recipe that I took a picture of and it was immensely satisfying. Then I took pictures of a few more treats that I made. Then I started taking pictures of my dinners. Now I can't stop, lol! I'm addicted!


Amazing Tunnel Cake
This butter cake has a fudgy center. My kids thought this looked really cool. They also thought it tasted great!

Ingredients:
3/4 cup Chocolate Syrup (recipe follows)
2 2/3 cups all-purpose flour
2 1/4 teaspoons baking powder
1/2 teaspoon salt
1 cup butter, softened
2 cups granulated sugar
4 eggs, lightly beaten
2 teaspoons vanilla extract
1 cup milk
1/4 teaspoon baking soda
Chocolate Glaze (recipe follows)

Directions:
1. Make Chocolate Syrup.
2. Position rack in lower third of oven; preheat to 350 degreesF. Grease a 10 by 4 inch tube or a 12 cup bundt pan; dust with flour.
3. In a medium bowl, whisk or stir together flour, baking powder, and salt; set aside.
4. In a medium bowl, and using electric beaters, cream butter until light and smooth. Add sugar in several additions, beating until mixture is light and fluffy. Slowly pour in beaten eggs, beating until mixture is light, fluffy, and smooth. Beat in vanilla.
5. Using a large rubber spatula, alternately stir in dry ingredients and milk, beginning and ending with dry ingredients, and blending well after each addittion. Pour two thirds of the batter into prepared pan, spreading evenly.
6. Add baking soda to Chocolate syrup; stir thoroughly. Pour Chocolate Syrup into remaining batter, blending thoroughly. Pour chocolate batter over vanilla batter, spreading evenly. Do not stir batters together.
7. Bake 50 to 55 minutes, or until cake tester inserted in center comes out clean. Remove pan to wire rack. Cool 10 minutes before loosening cake from pan with a knife and removing. Finish cooling right side up on rack. If desired, pour warm Chocolate Glaze over the cake, letting it run down the sides, or dust with confectioners' sugar.

Syrup:
1/2 cup granulated sugar
1/2 cup unsweetened cocoa powder
1/4 cup light corn syrup
1/2 cup hot water
1/2 teaspoon vanilla extract

Combine sugar, cocoa powder, corn syrup, and the water in a small, heavy saucepan. Cook and stir over low heat until completely blended; simmer 2 minutes, stirring constantly. Remove from heat; stir in vanilla. Cool to room temperature before using.

Glaze:
2 squares (2 ounces) semisweet chocolate
2 tablespoons butter
1/4 cup granulated sugar
2 tablespoons light corn syrup
pinch salt
1/4 cup heavy cream
2 teaspoons cornstarch
1 teaspoon vanilla extract

1. Combine chocolate, butter, sugar, corn syrup, and salt in a small, heavy saucepan. Cook over low heat, stirring occasionally until chocolate and butter melt and sugar dissolves.
2. Combine heavy cream and cornstarch in a measuring cup, stirring until well blended. Pour into chocolate mixture; cook over medium heat, stirring constantly until mixture begins to boil. Remove from heat; stir in vanilla. Cool glaze in pan 5 minutes, stirring occasionally, before pouring over cooled cake.

Blueberry Buckle

This is a recipe that my inlaws make. Until I had theirs, I had only had blueberry buckle only once, when a college roomate made it. I loved it then. I love it still! I think that this recipe is pretty much a classic, because I looked at some online recipe sites and they have this exact recipe listed. That made it easy for me, because I just cut and pasted and I didn't have to type it all out. The only difference in the recipe that I use is that there is a creamy lemon sauce that is poured over the cake. Personally, I don't love the sauce, and I could live without it. But Sean wouldn't deal with it very well, so I make the sauce anyway. Then, Sean insists that I also top it with whipped cream. Always a good addition, although I think I would really like this just as well sans sauce and whipped cream.

Photobucket - Video and Image Hosting

Blueberry Buckle
A delicious coffecake style recipe. You can use fresh or frozen blueberries.

For the cake:

3/4 cup white sugar
1/4 cup butter, softened
1 egg
1/2 cup milk
2 cups all-purpose flour
2 teaspoons baking powder
1/2 teaspoon salt
2 cups fresh blueberries

For the streusel topping:

1/2 cup white sugar
1/3 cup all-purpose flour
1/2 teaspoon ground cinnamon
1/4 cup butter, softened

For the sauce:

3 egg yolks
3 tablespoons sugar
1/2 teaspoon cornstarch
2 cups milk
1/2 teaspoon lemon extract
pinch salt

1. Preheat oven to 375 degrees F (190 degrees C). Grease one 8x8 inch pan.
2. Cream together 3/4 cup sugar, butter, and egg.
3. In a separate bowl mix together 2 cups flour, baking powder, and salt. Stir into sugar mixture, alternating with milk. Stir in blueberries. Pour into greased 8x8 inch pan.
4. To make topping: Combine 1/2 cup sugar, 1/3 cup flour, cinnamon, and butter. Sprinkle over cake batter.
5. Bake at 375 degree F (190 degrees C) for 25-30 minutes. When cooled, serve with sauce.
6. For the sauce: Beat egg yolks, add sugar mixed with cornstarch. Scald milk in top of double boiler, gradually stir in egg mixture. Cook until it coats a silver spoon, 5-6 minutes. Cool and flavor with lemon extract.

If you are married to my husband, you also have to top it with sweetened whipped cream.

Sunday, July 09, 2006

Little Things in Life That Are So Wonderful

hummus

hours of unlimited time at a bookstore or library (haven't had that since having children)

sitting outside in the shade with a breeze and its a perfect temperature

softball games (batting, catching, watching). I'm not that good, but I love swinging at the ball and hearing a perfect thunk sound when the ball hits the bat.

fabric, fabric stores, looking in the pattern book, daydreaming about what I might sew.

The final scene of the movie "Green Card".

A clean house (usually I'm visiting someone else)

Singing harmony. I'm good at it and it feels wonderful to blend beautifully with other voices.

A nonfiction book that is about something very interesting that I know very little about. I read the most interesting sections first, and then fill in the gaps by finding parts that I missed. I love it when I think I've read the whole book and then I stumble across a whole section of information that I had missed completely!

Pop songs that I remember loving when I was a kid in the 70's, such as: Captain and Tennille's song, "Love Will Keep Us Together", and "Silly Love Songs" by Paul McCartney, and "Here You Come Again", by Dolly Parton.

The sound of babies and toddlers laughing

Sliced avocado, cucumber, and sweet onion on a tortilla

My 2 1/2 year old who is obsessed with blowing strawberries (raspberries or whatever you call it). He can't stop himself. He does it to everyone he knows. He pulls your shirt down and blows on your chest. He pulls your shirt up and blows on your belly. He blows on your legs if you have shorts on. He blows on your cheeks and neck whenever you hold him. And he even does it in the middle of the night when he's half awake and finds an arm near his mouth. PBBBBTHHH!

Saturday, July 01, 2006

"That is one damn big hole!"

So said my husband, Sean, as he peered into the Grand Canyon. Meanwhile, I stood far back, in a panic, crying, telling my family to get away from the edge. It was terrifying. It is one damn big hole.

Thursday, May 25, 2006

I should do this more often

My kids came home from school and the first thing they always do is head for the fridge. They are usually starving.

Hannah opened the fridge and gasped..."Wow! Look at this! Cool! What did you do, Mom? Dylan, come here! You've got to see the fridge!"

What did I do that was so awe inspiring?

I cleaned it.

Monday, May 22, 2006

Talent, lack of talent, and a new site meter to prove it.

I said in my last post that I lack talent. Thats because I find other bloggers on the web who are just so good at writing. They make me laugh and they make me cry. Several months ago I posted a poem that I found hidden in an old journal of mine. I had written it when I was about 18. I lamented my lack of talent even then. Why do I want to be something I am not? Sigh.

Some of the blogs I have enjoyed:

Real Live Preacher: This guy is awesome! He is a real live preacher in San Antonio, TX
Ramblings of a Third Grade Mind: This is Real Live Preacher's brother.
Fat Free Vegan: I'm not fat free, nor am I vegan, but I love to cook and she does a great job with her recipes and pictures. I just love reading this blog.
Trixie Update: This guy is (was?) a stay at home Dad to his daughter while his wife was in Residency (or medical school, or something). He started Trixie Update to keep friends and family posted on what was going on. Lately, as Trixie has gotten older (I think she's 3 or so now), I think he has started to work and he doesn't post as much, but its worth it to go back and read the old stuff.

Site Meter

Just so I can depress myself with cold hard facts, I put a site meter on my blog so I can know just how few people actually read this thing.

Ok, just so you know, I lack confidence in my writing (betcha couldn't tell), and I haven't really told more than one or two people about the blog anyway, so, um, no wonder!